Experiences of Using Commonly Used Git Commands in Linux
Git is a distributed version control software, originally created by Linus Torvalds and released in 2005 under the GPL license agreement. The original purpose was to better manage Linux kernel development. Git is a version control tool used for Linux kernel development. Unlike centralized version control tools such as CVS and Subversion, it uses a distributed version library approach and can operate version control without server-side software, making the release and communication of source code extremely convenient. Git is very fast, which is naturally important for large projects such as the Linux kernel. The most outstanding feature of git is its merge tracing capability. This article briefly introduces the commonly used commands in the use of git
1. First set your username and email
git config --global user.name "nmy"
git config --global user.email "nmy@weathink.com"
git config --global --list
user.name=ken
user.email=ken@gmail.com
Among them, --global indicates that user.name and user.email are global variables. The so-called global variables are valid in any version library on your PC. user.name and user.email represent user name and email address respectively. We can use --list to list the contents we have set. It should be noted that user.name and user.email must be set so that we can know who has modified the project in the future. In fact, there are more than 130 options that can be set in git, but most of them are not commonly used.
2. Git output color settings
git config --global color.ui "always"
git config --global --list
user.name=ken
user.email=ken@gmail.com
color.ui=always
If you find that all the colors displayed when using git branch are black and white, it means that the colors are not configured correctly. Please use the git config --global color.ui "always" command.
3. Create a repository
mkdir project
cd project/
git init
Initialized empty Git repository in /home/ken/project/.git/
In the above operation, we first created the project directory, and your project files are stored in this directory. Then execute: git init in the directory. OK. It's very simple. At this time, a .git directory will be generated in the /project/ directory, which can be seen by ls -a. Switch to this directory and you will see some files and directories, which are mainly used to store the metadata of the version library.
4、git add 和 git commit
For kernel sources, since .config is not included in git, you need to
git add .config
Then modify .config and make through make menuconfig, and then use the git status command to view the file modifications in the git directory. At this time, you can see that many intermediate .o files have been modified, and many .o files will be listed, such as
# modified: .config
# .config.old
# drivers/usb/core/.config.o.cmd
# drivers/usb/core/config.o
# include/config/
# kernel/.config_data.gz.cmd
# kernel/.config_data.h.cmd
# kernel/.configs.o.cmd
# kernel/configs.o
But these intermediate files are not what we need. If we are sure to modify .config, we need to submit .config at this time. Use git commit -a -m "modif config", which will submit all the files added in git. If there are other file modifications at this time, they will also be submitted.
At this time, enter the command
git log
It will display all the information submitted before
git log -1
It will display the information of the most recent submission
5、git branch
View all branches
As shown below
root@desktop:~/pru-eight-suart-smard-card-20110912/pru-linux-drivers# git branch
* DIR
master
The asterisk indicates the current branch
If you need to delete a branch, enter the command
git branch -D rrrr
Add branch command
git branch sub_1 master
The third parameter is the new branch, and the fourth parameter indicates the parent branch. Here our parent branch is the main branch master. So this command is to create a new branch sub_1 on the main branch master.
Switch branches, such as
git checkout sub_1
6、git help
Enter the help command
7. Release version
git tag 1.0 sub_1
git tag
1.0
In the first instruction above, the third parameter is the tag, and the last one is the dot indicating the tag; next, the last thing we need to do is to package the released version into a tar or zip package. The command git archive can achieve this function:
git archive --format=tar --prefix=helloworld-1.0/ 1.0 | gzip > helloworld-1.0.tar.gz
8. git checkout to remote branch
git branch -r
origin/DIR
origin/HEAD -> origin/master
origin/master
origin/pru-migration
origin/pru1-migration
origin/sc-driver-dev
origin/sc-driver-dev-pru1
origin/sc-test
origin/suart-driver-dev
Then git checkout origin/DIR
9. git status -u normal prohibits outputting files that have not been added
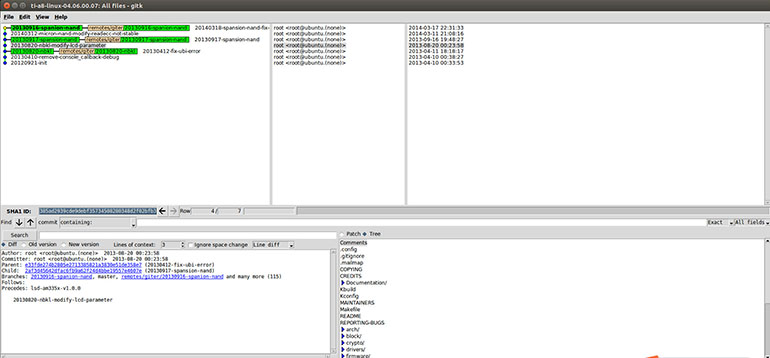
10. Install gitk graphical interface, which can easily manage and view git branches and commits
apt-get install gitk
Start the graphical git interface

Figure 1, gitk effect diagram
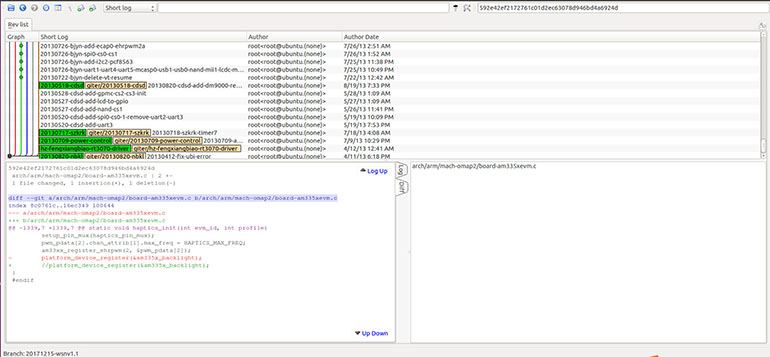
11. qgit graphical interface, qgit is developed using git, and the effect is better
apt-get install qgit
When using qgit, you can check the display All Branches when starting, and then you can display the switching between all branches. This function is very good, equivalent to a tree diagram
git ls-files displays all files in the warehouse.
git ls-files -m displays modified files.
git reset SHA1 returns to the commit status corresponding to SHA1.

Figure 2. qgit effect diagram
10. Delete files in git add
If you have previously operated git add 123
git rm -f 123 to delete 123 in the git repository, and delete the file 123
Or git rm --cached 123 to delete 123 in the git repository, do not delete the file directly
If you want to delete all types of files, you can
git rm --cached -r *.txt
The Linux SOM launched by Weathink all use git to manage code and project branches, such as:
Renesas G2L SOM : https://www.weathink.com/products/hexinban/4.html
TI AM62x SOM: https://www.weathink.com/products/hexinban/11.html


